How to use Windows Pro’s BitLocker device encryption on any PC
Most people who use the Home Edition of Windows 10 and 11 are unlikely to be aware that their computer also comes with a Microsoft encryption tool. On many computers, it’s even activated by default. But Microsoft’s “BitLocker” hard drive encryption has always been one of the functions defining the Pro version of the operating system.
Officially, this also applies to Windows 11; Microsoft even lists BitLocker device encryption first in its Home vs. Pro comparison. So what’s this all about?
If you type the term “BitLocker” into the search field in the Home version, the Start menu shows a hit with the corresponding app icon. However, the subtle difference to Windows Pro is that the Home version lacks the addition “manage” and BitLocker does not start.
It’s hard to imagine that the function could actually be available. But that’s actually the case, just under a different name.
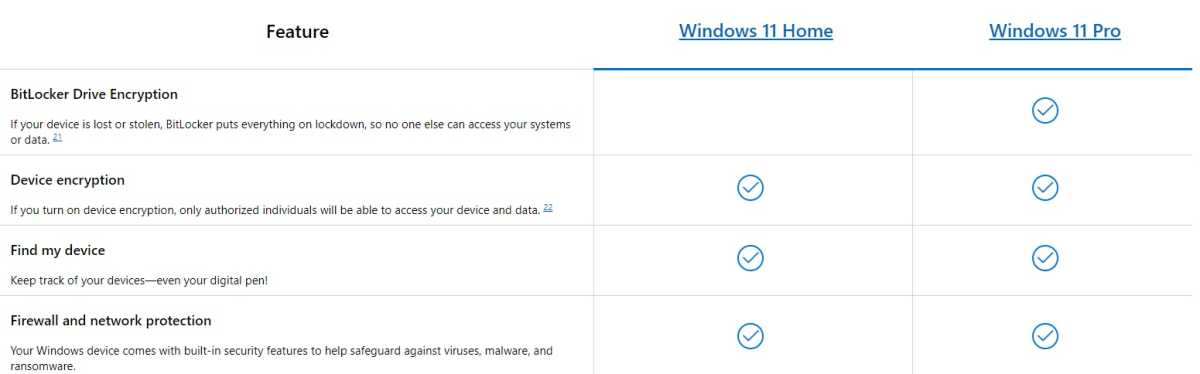
Microsoft always emphasizes that BitLocker is reserved for Windows Pro. However, the Home versions also offer data encryption, just with a slightly different name: “Device encryption.”

Microsoft always emphasizes that BitLocker is reserved for Windows Pro. However, the Home versions also offer data encryption, just with a slightly different name: “Device encryption.”
Foundry

Microsoft always emphasizes that BitLocker is reserved for Windows Pro. However, the Home versions also offer data encryption, just with a slightly different name: “Device encryption.”
Foundry
Foundry
Before we go into the tool called “Device Encryption” in the Home version, let us briefly explain why this function is extremely important. Unlike logging on to the PC, encryption effectively prevents any unauthorized access.
Without this protection, you could simply remove the drive and gain access to the stored data. If the data is encrypted, this is not possible. This function is therefore particularly important for laptops, as mobile computers are more easily stolen or accidentally left lying around somewhere.
Further reading: Master these Windows 11 features to supercharge your efficiency
System requirements for device encryptionTo be able to use device encryption, four requirements must be met: Firstly, the PC must have a modern UEFI (instead of the previous BIOS) and secondly, an up-to-date TPM chip (Trusted Platform Module). Both of these have been standard for many years.
In addition, the device must support the “Modern Standby” (S0) power-saving mode. You can check whether your computer is able to do this as follows: Open the command prompt with administrator rights, type in the command
powercfg /aand press the Enter key. If the response “Standby (S0 low power state) … available on this system” appears, the third requirement is also met. If “Standby (S0 Low power idle) is not supported by the system firmware,” please check the manufacturer or device-specific UEFI menu to see whether it can be activated there.
get windows 11 pro for cheap for full bitlocker access Windows 11 Pro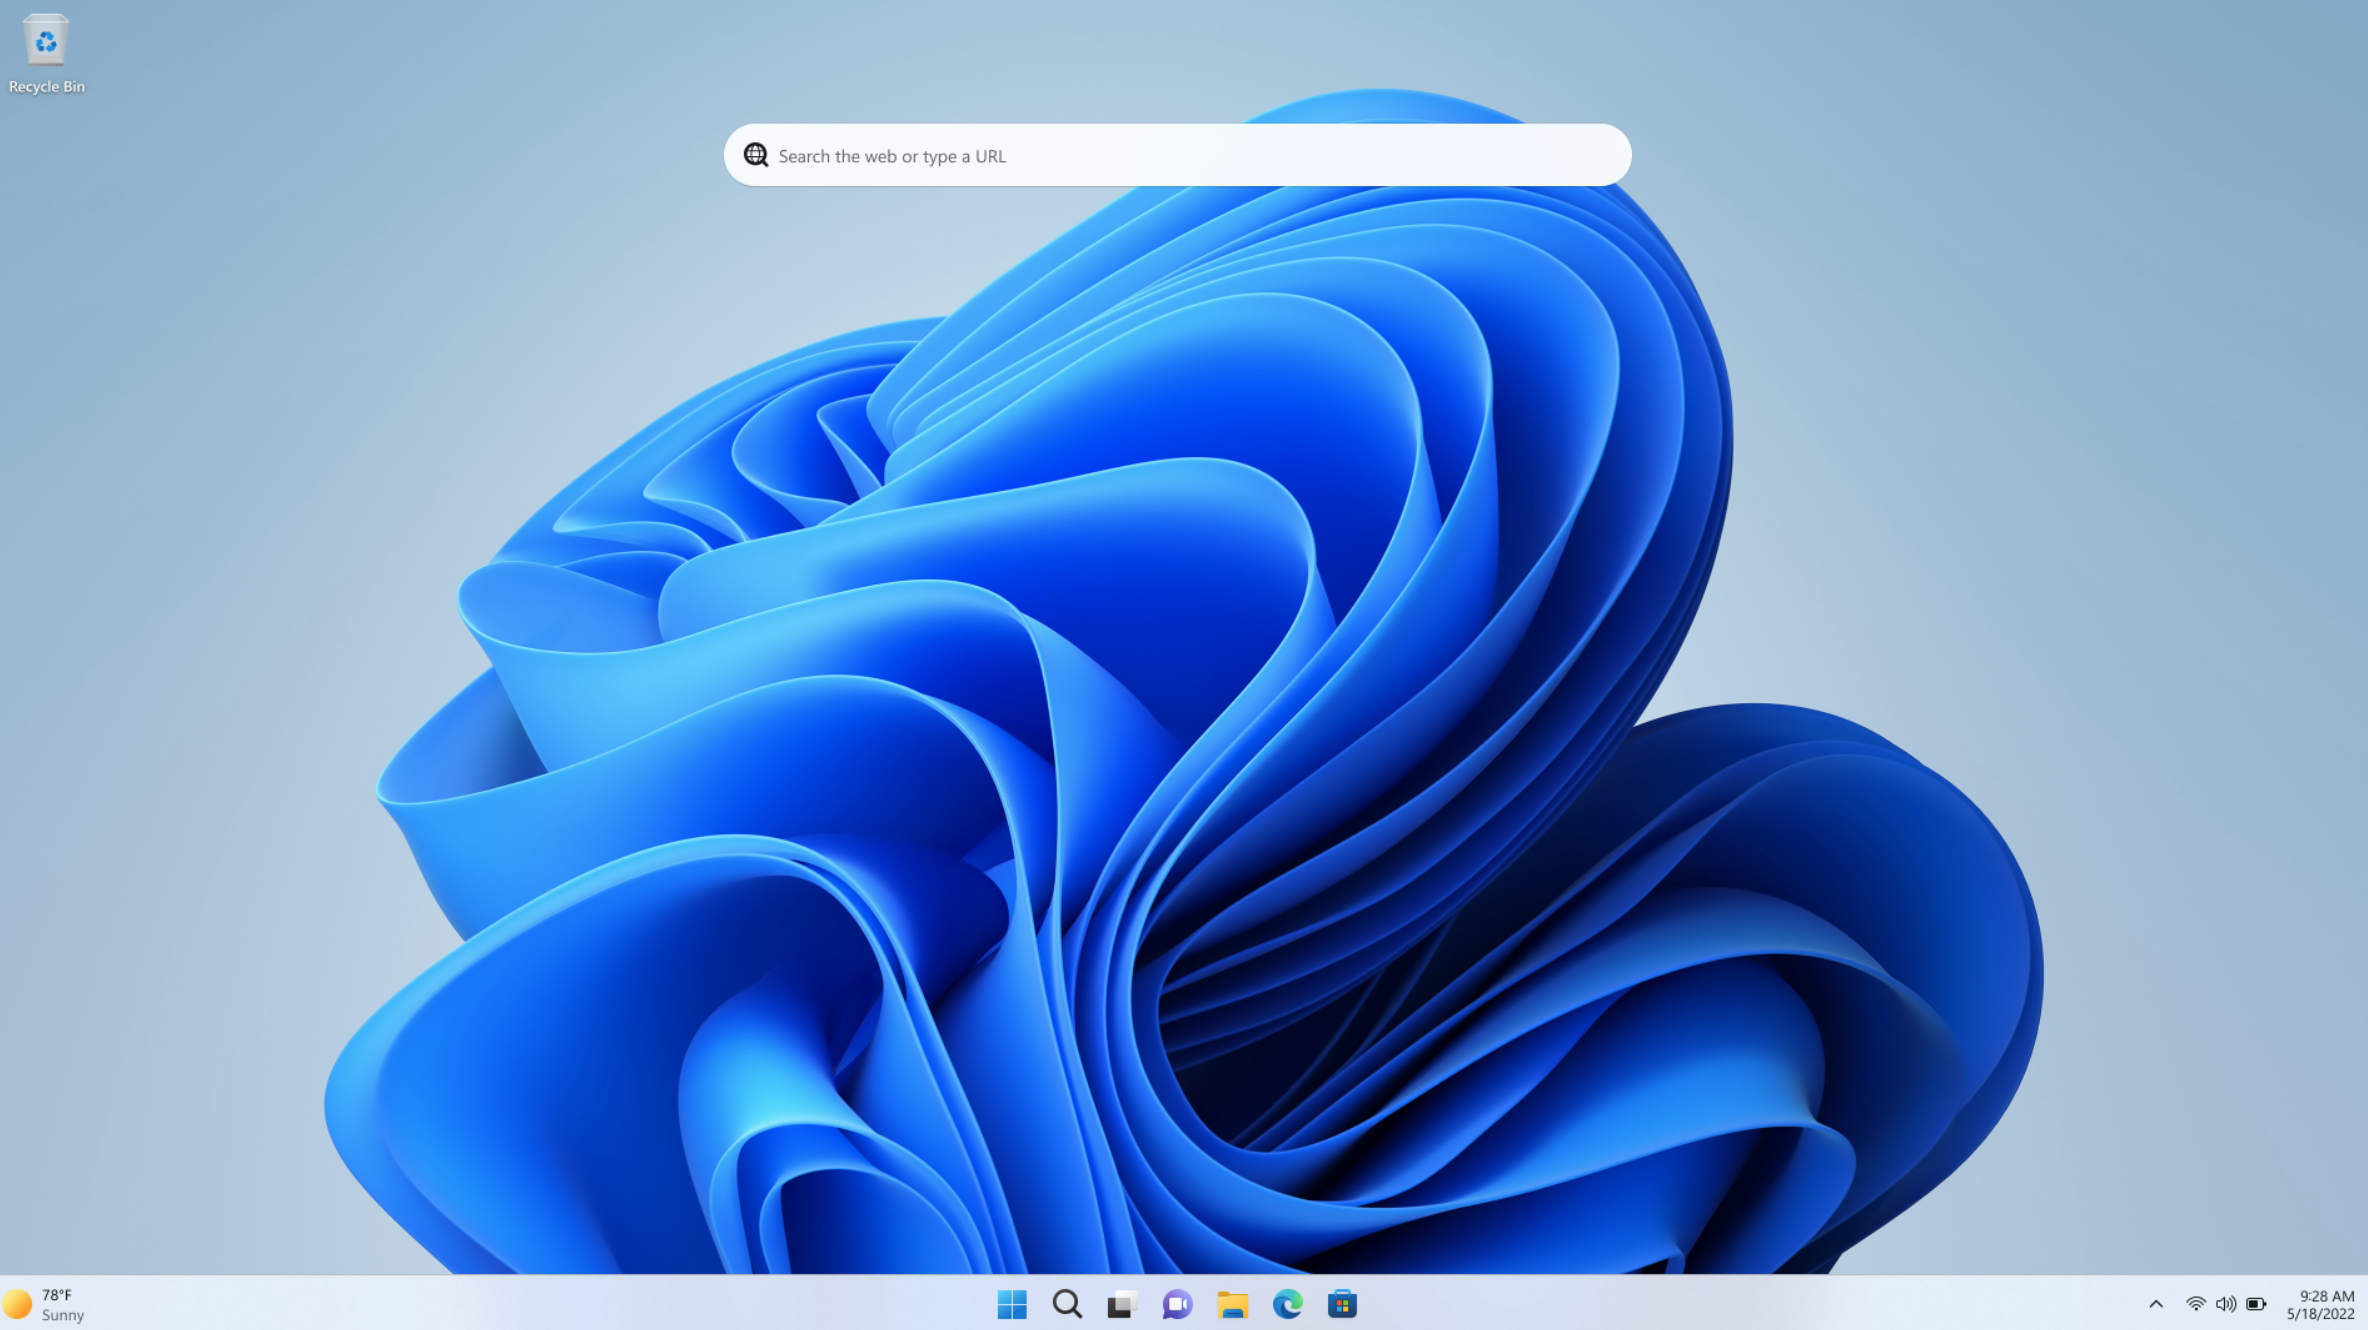 Price When Reviewed:
199.99
Best Prices Today:
$59 at PCWorld Store – Win 11 Pro Upgrade Only |
$79.99 at PCWorld Software Store
Price When Reviewed:
199.99
Best Prices Today:
$59 at PCWorld Store – Win 11 Pro Upgrade Only |
$79.99 at PCWorld Software Store
Fourthly, the Secure Boot option must be available and switched on. Because this requires settings to be made in the UEFI, you may have to search for them before device encryption is ready to start. So don’t give up straight away.
For the final compatibility check and correct configuration, type:
msinfoin the search and input field of the taskbar and start the system information by right-clicking as administrator. Check whether the entry “Support for device encryption” at the bottom says “Requirements met.”
If not, Windows will display the cause of the error when you move the mouse over it. The missing “PCR7 binding” is often cited. The above-mentioned prerequisites are hidden behind this; a targeted Google search often helps. More information can be found in the box “Problems with device encryption.”
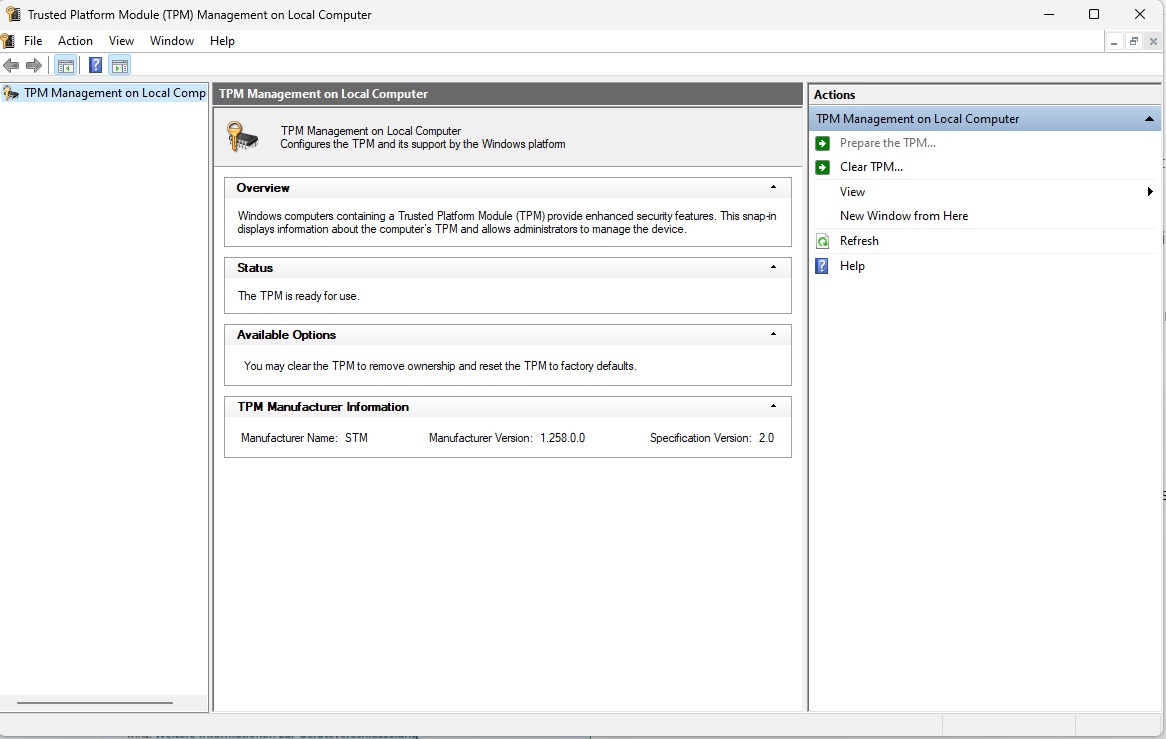
Confirm that the Trusted Platform Module is activated before proceeding.
Confirm that the Trusted Platform Module is activated before proceeding.
Foundry
Confirm that the Trusted Platform Module is activated before proceeding.
Foundry
Foundry
An activated TPM chip (Trusted Platform Module) in version 2.0 is one of the prerequisites for using Windows device encryption. You can check whether TPM is activated in your computer’s UEFI by typing the command:
tpm.mscagain in the input field. If it says “The TPM is ready for use” under Status and “2.0” after the specification version, everything is correct.
Otherwise, activate the component in the UEFI; Microsoft describes the procedure for important device manufacturers. After the UEFI changes and the reboot, type tpm.msc again and start the setup wizard on the right with “Prepare TPM.” Also switch on Secure Boot in the UEFI.
Status of device encryption, differences to BitLocker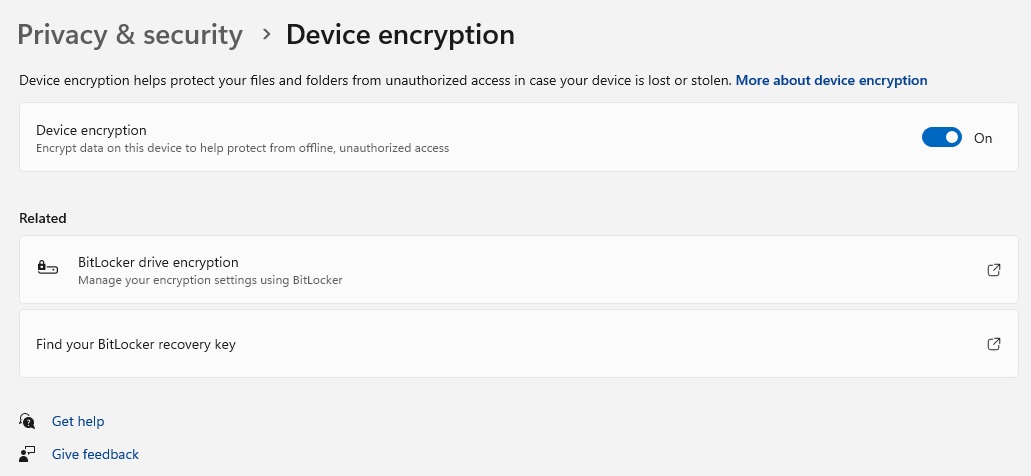
Device encryption is switched on in the Windows Settings app. The prerequisite for operation is that you log in to the computer with a Microsoft account.
Device encryption is switched on in the Windows Settings app. The prerequisite for operation is that you log in to the computer with a Microsoft account.
Foundry
Device encryption is switched on in the Windows Settings app. The prerequisite for operation is that you log in to the computer with a Microsoft account.
Foundry
Foundry
The next step is to check in the Settings app under “Privacy and security” (Windows 11) or “Update and security” (Windows 10) whether device encryption is already switched on. If not, activate it using the slide switch.
Important at this point: Device encryption only works after logging in with the online account at Microsoft, not with a local Windows account.
BitLocker in Windows 10 and 11 Professional offers a whole range of settings and can be configured in detail using the operating system’s group policy editor. Microsoft provides a detailed explanation online. There is also the “BitLocker to go” function for encrypting USB sticks and other removable data carriers.
The Home Edition does not offer any of this; here, device encryption can only be switched on or off. However, the “economy version” with its key length of 128 bits reliably fulfills its actual purpose, namely to securely protect your data from unauthorized access.
Tip: You can recognize that device encryption is activated and working by the (open) lock symbol next to the drives in Windows Explorer.
The command line tool managebde.exe shows more details — including whether encryption is running and to what extent the data is already encrypted when the function is switched on. This process can take up to two hours. For the Windows partition, call up the status display using the following command in the command prompt with Administrator:
manage-bde -status c:The conversion and protection statuses are particularly important. Please do not be surprised that “Unlocked” is noted behind Lock status — after all, you have logged on to the computer and thus automatically unlocked your data.
Note: Please note that the control parameters mentioned for the command line tool only apply to the BitLocker version for the most part, despite the tool having the same name.
Problems with device encryptionThe most common problems occur during setup, i.e. before you even use device encryption in Windows 10/11 Home.
The causes usually lie in incorrect UEFI settings and missing system requirements.
Some hurdles can be overcome with a little web research, but if the hardware is really incompatible, the only solution is to encrypt your data with Veracrypt instead of Windows.
The box below describes more about this alternative tool.
Other problems occur suddenly and unexpectedly. The author has experienced this himself twice: Once Windows demanded the recovery key after a UEFI update, once the backup of the Windows drive via a live system failed. It is important not to panic, but to investigate the causes and look for solutions.
Protect data and unlock again in an emergencyWhile the setup process, including the hardware check and any changes in the UEFI, can be somewhat tedious, the device encryption then works completely in the background without you noticing anything. This is because the operating system automatically unlocks access to the hard drive when you log on to the computer — so you don’t need to do anything extra.
Conversely, the data is immediately encrypted again when you log off or switch off. However, this protection only makes sense if you have provided your Microsoft account with a sufficiently secure password. This is mandatory anyway, and a second factor (2FA) further increases the level of protection.
Tip : It’s quicker and more convenient to log in via Windows Hello than by typing in a long password: using a (hardware-based) PIN, fingerprint sensor or facial recognition via the camera.
If you don’t have a fingerprint sensor or camera, you can use USB Logon to configure a USB stick for logging in and out.
Any particularly good protection tends to increase the risk of locking yourself out at some point. In the case of device encryption, for example, if the mainboard or PC breaks, because encryption and decryption is linked to the TPM chip on the board.
To prevent this from happening, Windows generates a 48-digit “recovery key” when activating device encryption and BitLocker and saves it in your Microsoft account.
Because any unforeseen unlocking requires the recovery key, check whether it is available. Also save it in a password manager or print it out and keep the printout in a safe place.
To check, log in https:// account.microsoft.com/devices/recoverykey at Microsoft and copy the key(s) to the Windows clipboard. Because each partition is encrypted separately, several partitions may be displayed on one computer. The abbreviation OSV (Operating System Volume) refers to the system drive, FDV (Fixed Data Volume) to other data drives.
Alternative VeracryptVeracrypt is more flexible than the device encryption integrated in Windows. The tool can also be used to encrypt individual partitions, folders, files and mobile data carriers such as USB sticks. The Home edition of Windows does not offer this very important function.
In addition, Veracrypt does not recognize the strict system requirements of Windows internal encryption. Veracrypt is easy to use.
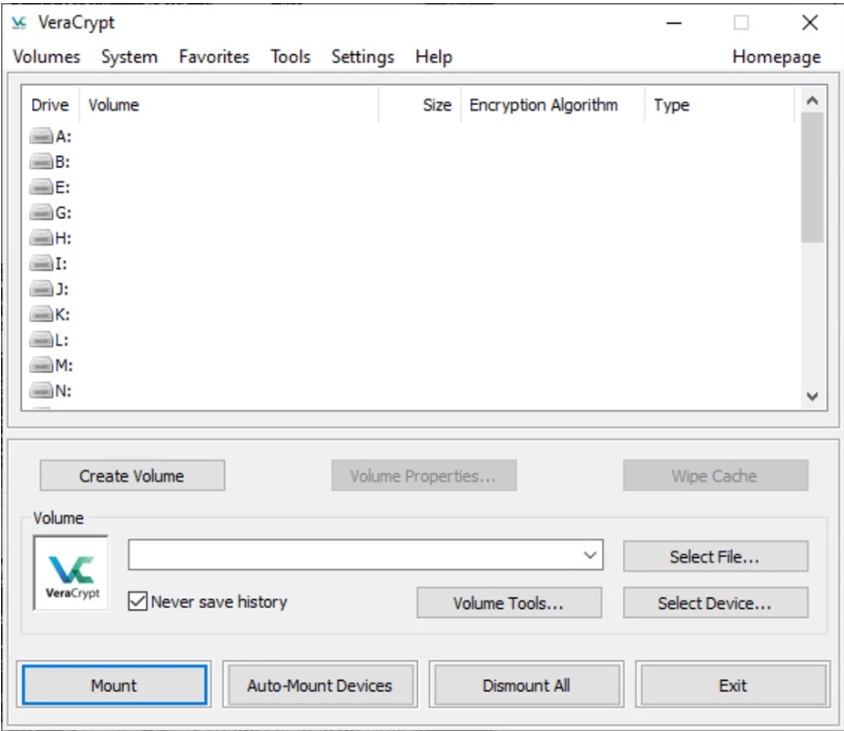
The Veracrypt encryption software is more flexible than the Windows-internal device encryption, and the system requirements are significantly lower.
The Veracrypt encryption software is more flexible than the Windows-internal device encryption, and the system requirements are significantly lower.
Foundry
The Veracrypt encryption software is more flexible than the Windows-internal device encryption, and the system requirements are significantly lower.
Foundry
Foundry
Two tips: Before installing the software, please make sure that Windows’ own device encryption is deactivated using the status command manage-bde -status c: (see previous page). In addition, create a backup of your unencrypted data, for example with R-Drive Image.